
I think I may have briefly covered this in a previous post but after recently shooting some waterfalls I figured it would probably be helpful to write about this topic in more detail.
Waterfalls and their surrounding forests are always a magnet for photographers of any skill level due to their serene nature, flowing water, beautiful green hues and glistening rocks. While these amazing locations look beautiful at any time of the day, photographing them can be a little tricky. Fortunately these issues can be overcome with a few easy steps.
As I mentioned above, I recently visited some falls in the Marysville region of Victoria. Being unfamiliar with the area and not knowing exactly what to expect, I arrived at the falls relatively early in the morning to allow time to explore. After a 1km hike through some semi-dense forest I came to the base of the falls. It was a beautiful sight. There was just one problem….The sun was shining down over the falls creating deep shadows and very bight highlights. Whilst these conditions don’t rule out shooting all together, they certainly can make capturing everything in one shot extremely difficult.
Just like any photographer, I love capturing that silky smooth long exposure effect on water. Our problem here though is that the dynamic range in this scene is far to great to capture in one shot without some minor tradeoffs. Yes we can bracket our images at varying exposures and blend them using Photoshop, but the end result can sometimes look a little unnatural. On this occasion I decided to try out a few compositions regardless of the conditions. I had taken the time to walk here, I might as well see what I can capture.
To try and combat the harsh sunlight around the top of my frame I added a graduated neutral density filter to darken the upper third of the image. Whilst that helped a little it doesn’t give the long exposure effect on the water. To achieve that, I also added a 6 stop neutral density filter to darken the overall scene and allow me to lengthen my shutter speed. Finally, to cut through the glare on the water and rocks I used a circular polariser.
To best capture a scene like this in one shot, I always expose for the highlights. You can always boost the dark shadows in your images to even out your exposure, but you will never be able to recover blown out highlights. How much detail you can bring back in your shadow areas will be determined by your camera and it sensor. For this shot I was using my old Nikon D800 which retains pretty good shadow details so I knew I would be able to bring back the dark areas with only small amounts of noise.

This is the RAW file straight out of camera
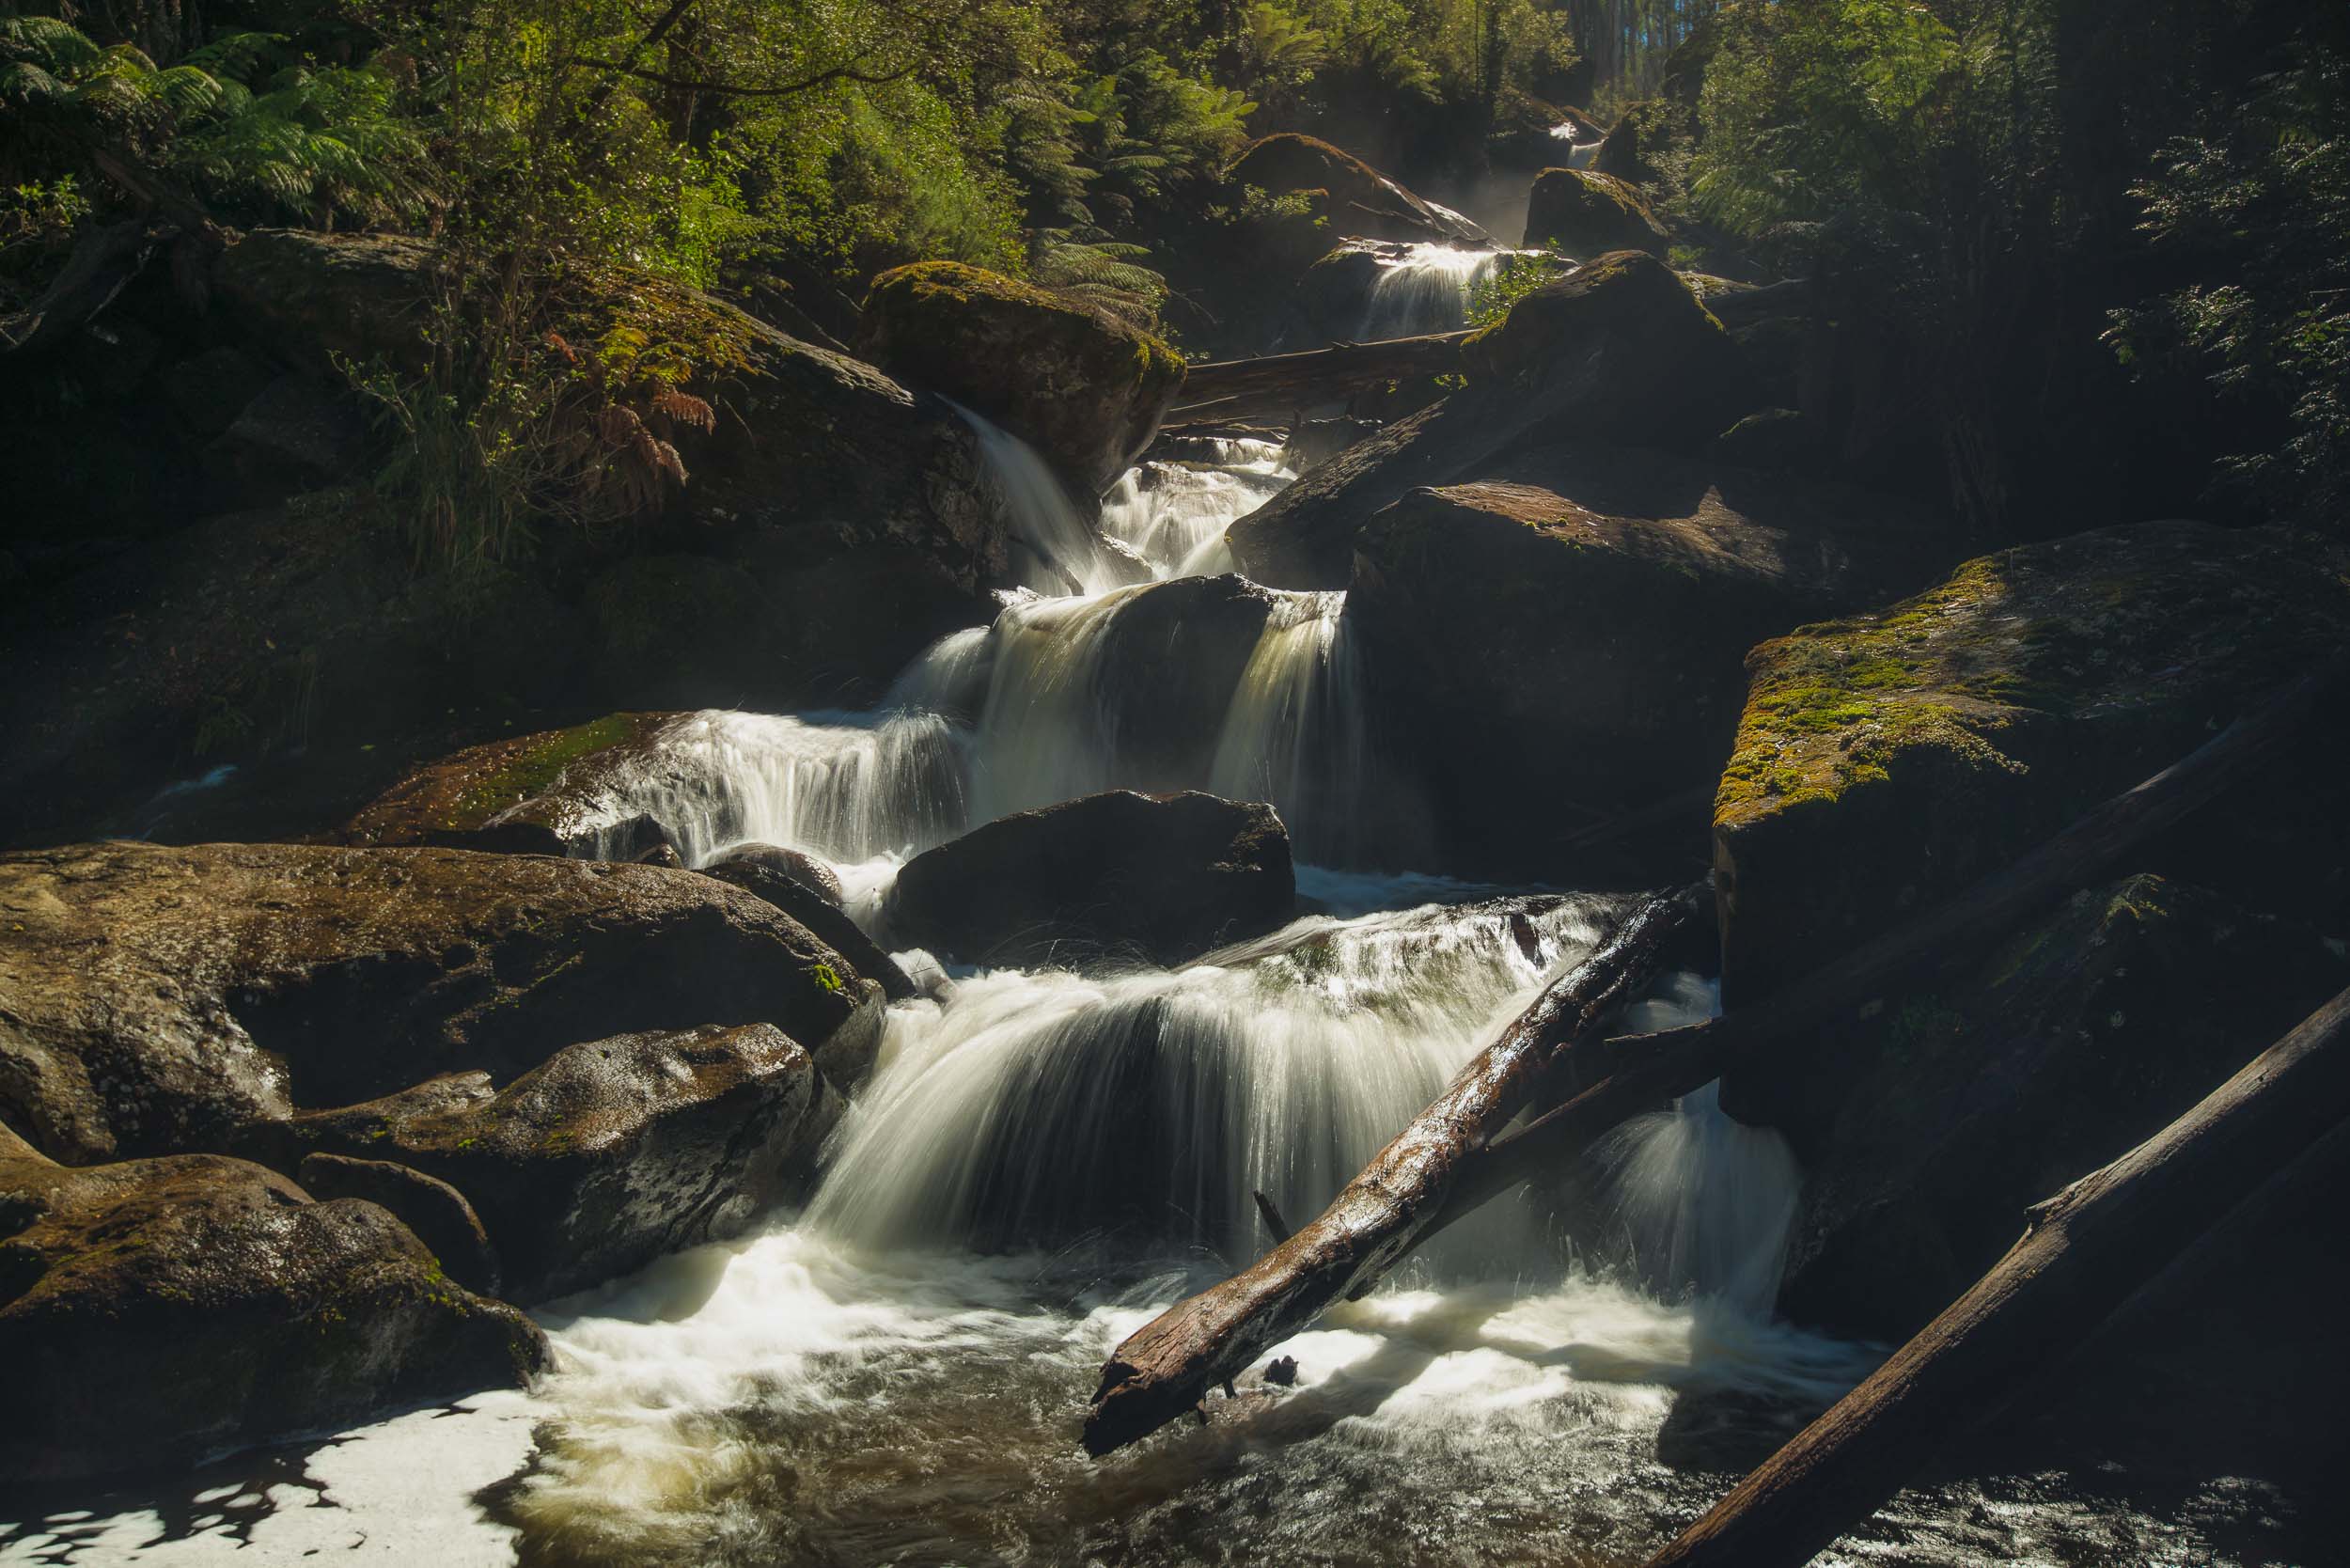
ISO 100 | f/11 | 35mm | 1 sec - Edited and colour corrected in Lightroom
Using these techniques I was able to capture the above image. I have included both the RAW file and the Lightroom edited version so that you can see the differences. Whist it is a true representation of the scene as it was, it is definitely not as pleasing to the eyes as what would be possible without the harsh sunlight. The result is a washed out and overly contrasty image. The easiest solution to this problem is to remove the harsh sunlight. To do this you can either pick an overcast day to come back and shoot, or in my case I noticed that the falls were situated in a valley surrounded by tall trees. All I would have to do is wait until later in the afternoon when the sun had set low enough that the hills and trees were blocking the light, bringing the entire location into shadow.
Now that our light is completely flat, there are no bright highlights or deep shadows. This removes the need for the graduated ND filter and (depending on how dark it is) the 6 stop ND filter. One tool that I always retain though for shooting waterfalls is the circular polariser. Despite the lack of sunlight, there is still reflection/glare on the water and rocks and cutting through that will not only improve your image but it will boost your colour and contrast. For this shot I still expose for the highlights however it is much easier to achieve a well balanced exposure due to the flat light.
The below image is from the afternoon shoot. The results are 100% better in my opinion. You can fully appreciate the colours and your eyes are not distracted by the overly bright highlights. I realise that in some situations it is not always possible to wait for a rainy day or come back at sunset. There have been many occasions where I just had to make do with the conditions available as that was the only time I had in that location. If however you have the luxury of time, I would definitely recommend visiting a location initially to scope out the area and compositions, then return when the light is right. It makes our job as photographers so much easier and it can take our images to the next level.
Summarised Tips
- Shooting in flat, even light will always yield the best results
- Always use a polariser
- Graduated and regular ND filters can help control uneven lighting situations
- Expose for the highlights
- Always shoot in RAW to give you more editing power in Lightroom when it comes to boosting shadows and reducing highlights
- Check out your shooting location ahead of time to work out where the light falls and the best time of day to shoot.

ISO 100 | f/16 | 24mm | 0.4 sec