Exploring the Flinders Ranges


When you are travelling to a well known location like the Flinders Ranges, it is easy to have preconceived ideas and images in your head about what the experience will be like. I had heard stories from friends and family about how awesome it was and I’d seen the occasional image come across my Instagram feed (mainly from amazing South Australian photographer, Ben Goode) so I thought I knew what was in store for us when we got there.

I was so wrong!

DSC_3102-Edit-Edit.jpg

I don’t think anything could have prepared me for the beautiful vistas and sheer vastness of the Flinders Ranges. This is not just a small mountain range that goes for a few kilometres…this baby is of epic proportions! It stretches for over 430kms and is the largest mountain range in South Australia. To top it all off, they have had quite a wet, ‘dry season’ which has turned the arid landscape into all shades of green.

P8110078-Edit.jpg

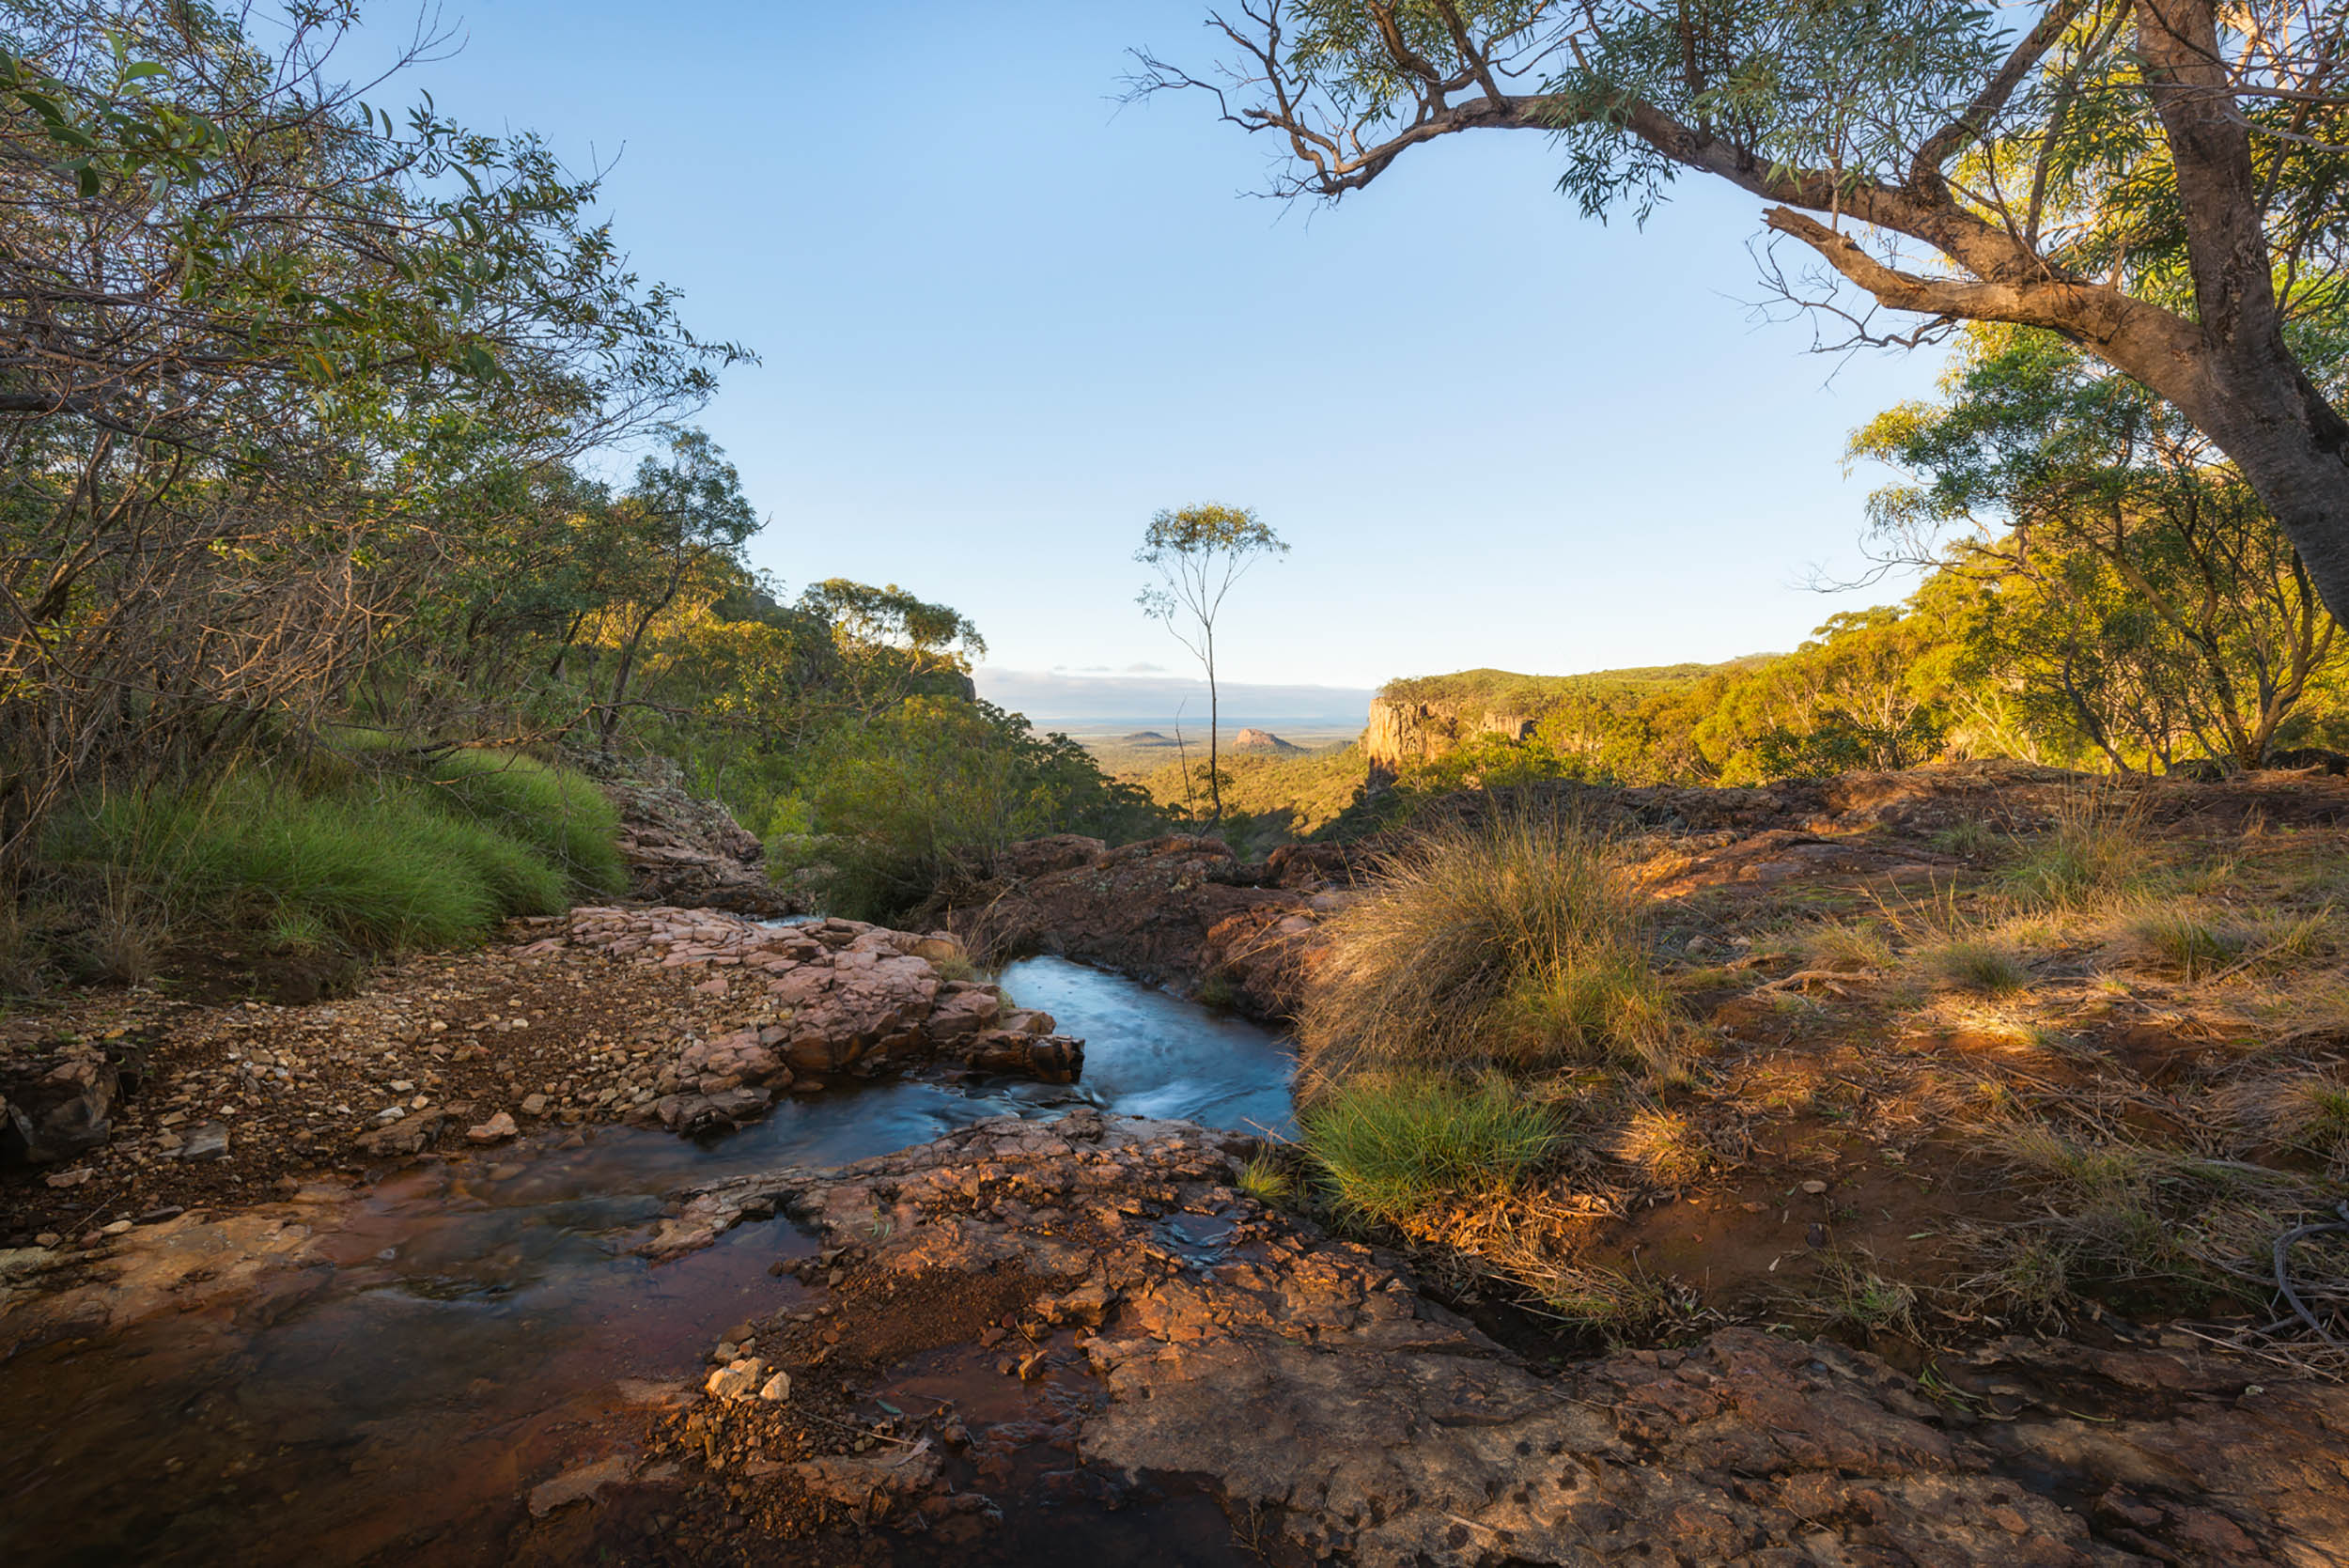
We drove up from Hawker in the south and by this point we had already been impressed by the southern parts of the range that are easily viewable from the highway and seem to follow you everywhere you go. When we started making our way north the landscape slowly changed from farm land to undulating hills with dry creeks lined by beautifully gnarled gum trees.

Getting closer we drove past a number of lookout points just off the highway. I highly recommend stopping in along the way as these viewpoints not only give you a moment to pause from the drive to better appreciate what you are seeing, but from a photography perspective it gives you possible locations to return to later at either sunrise or sunset when the light is right.

DSC_2878-Edit.jpg

It’s at this point that the landscape takes it up a notch. The open areas close in on all sides to become cypress-pine forests and the cliff edges of Wilpena Pound tower down from above. The first thing that came to mind was that somehow we had been transported to a national park in the United States as this was definitely not a sight that I was used to being from Central Queensland.

The destination for our stay in the Flinders Ranges was Wilpena Pound Resort (and before you ask… no we haven’t ditched our caravan in favour of glamping). We shacked up in the campground area at the back of the resort and apart from the modern amenities, it was just like camping in the bush. It has ample space and there are no site allocations so you can setup pretty much anywhere you want.

P8130069-Edit.jpg

Wilpena Pound itself is a large, crater-shaped natural amphitheatre that covers approximately 80 square kilometres. To get a view over the entire area it is best seen from the air (scenic flights are available at the resort) or St Mary Peak which is the range’s highest point (1,171m). 

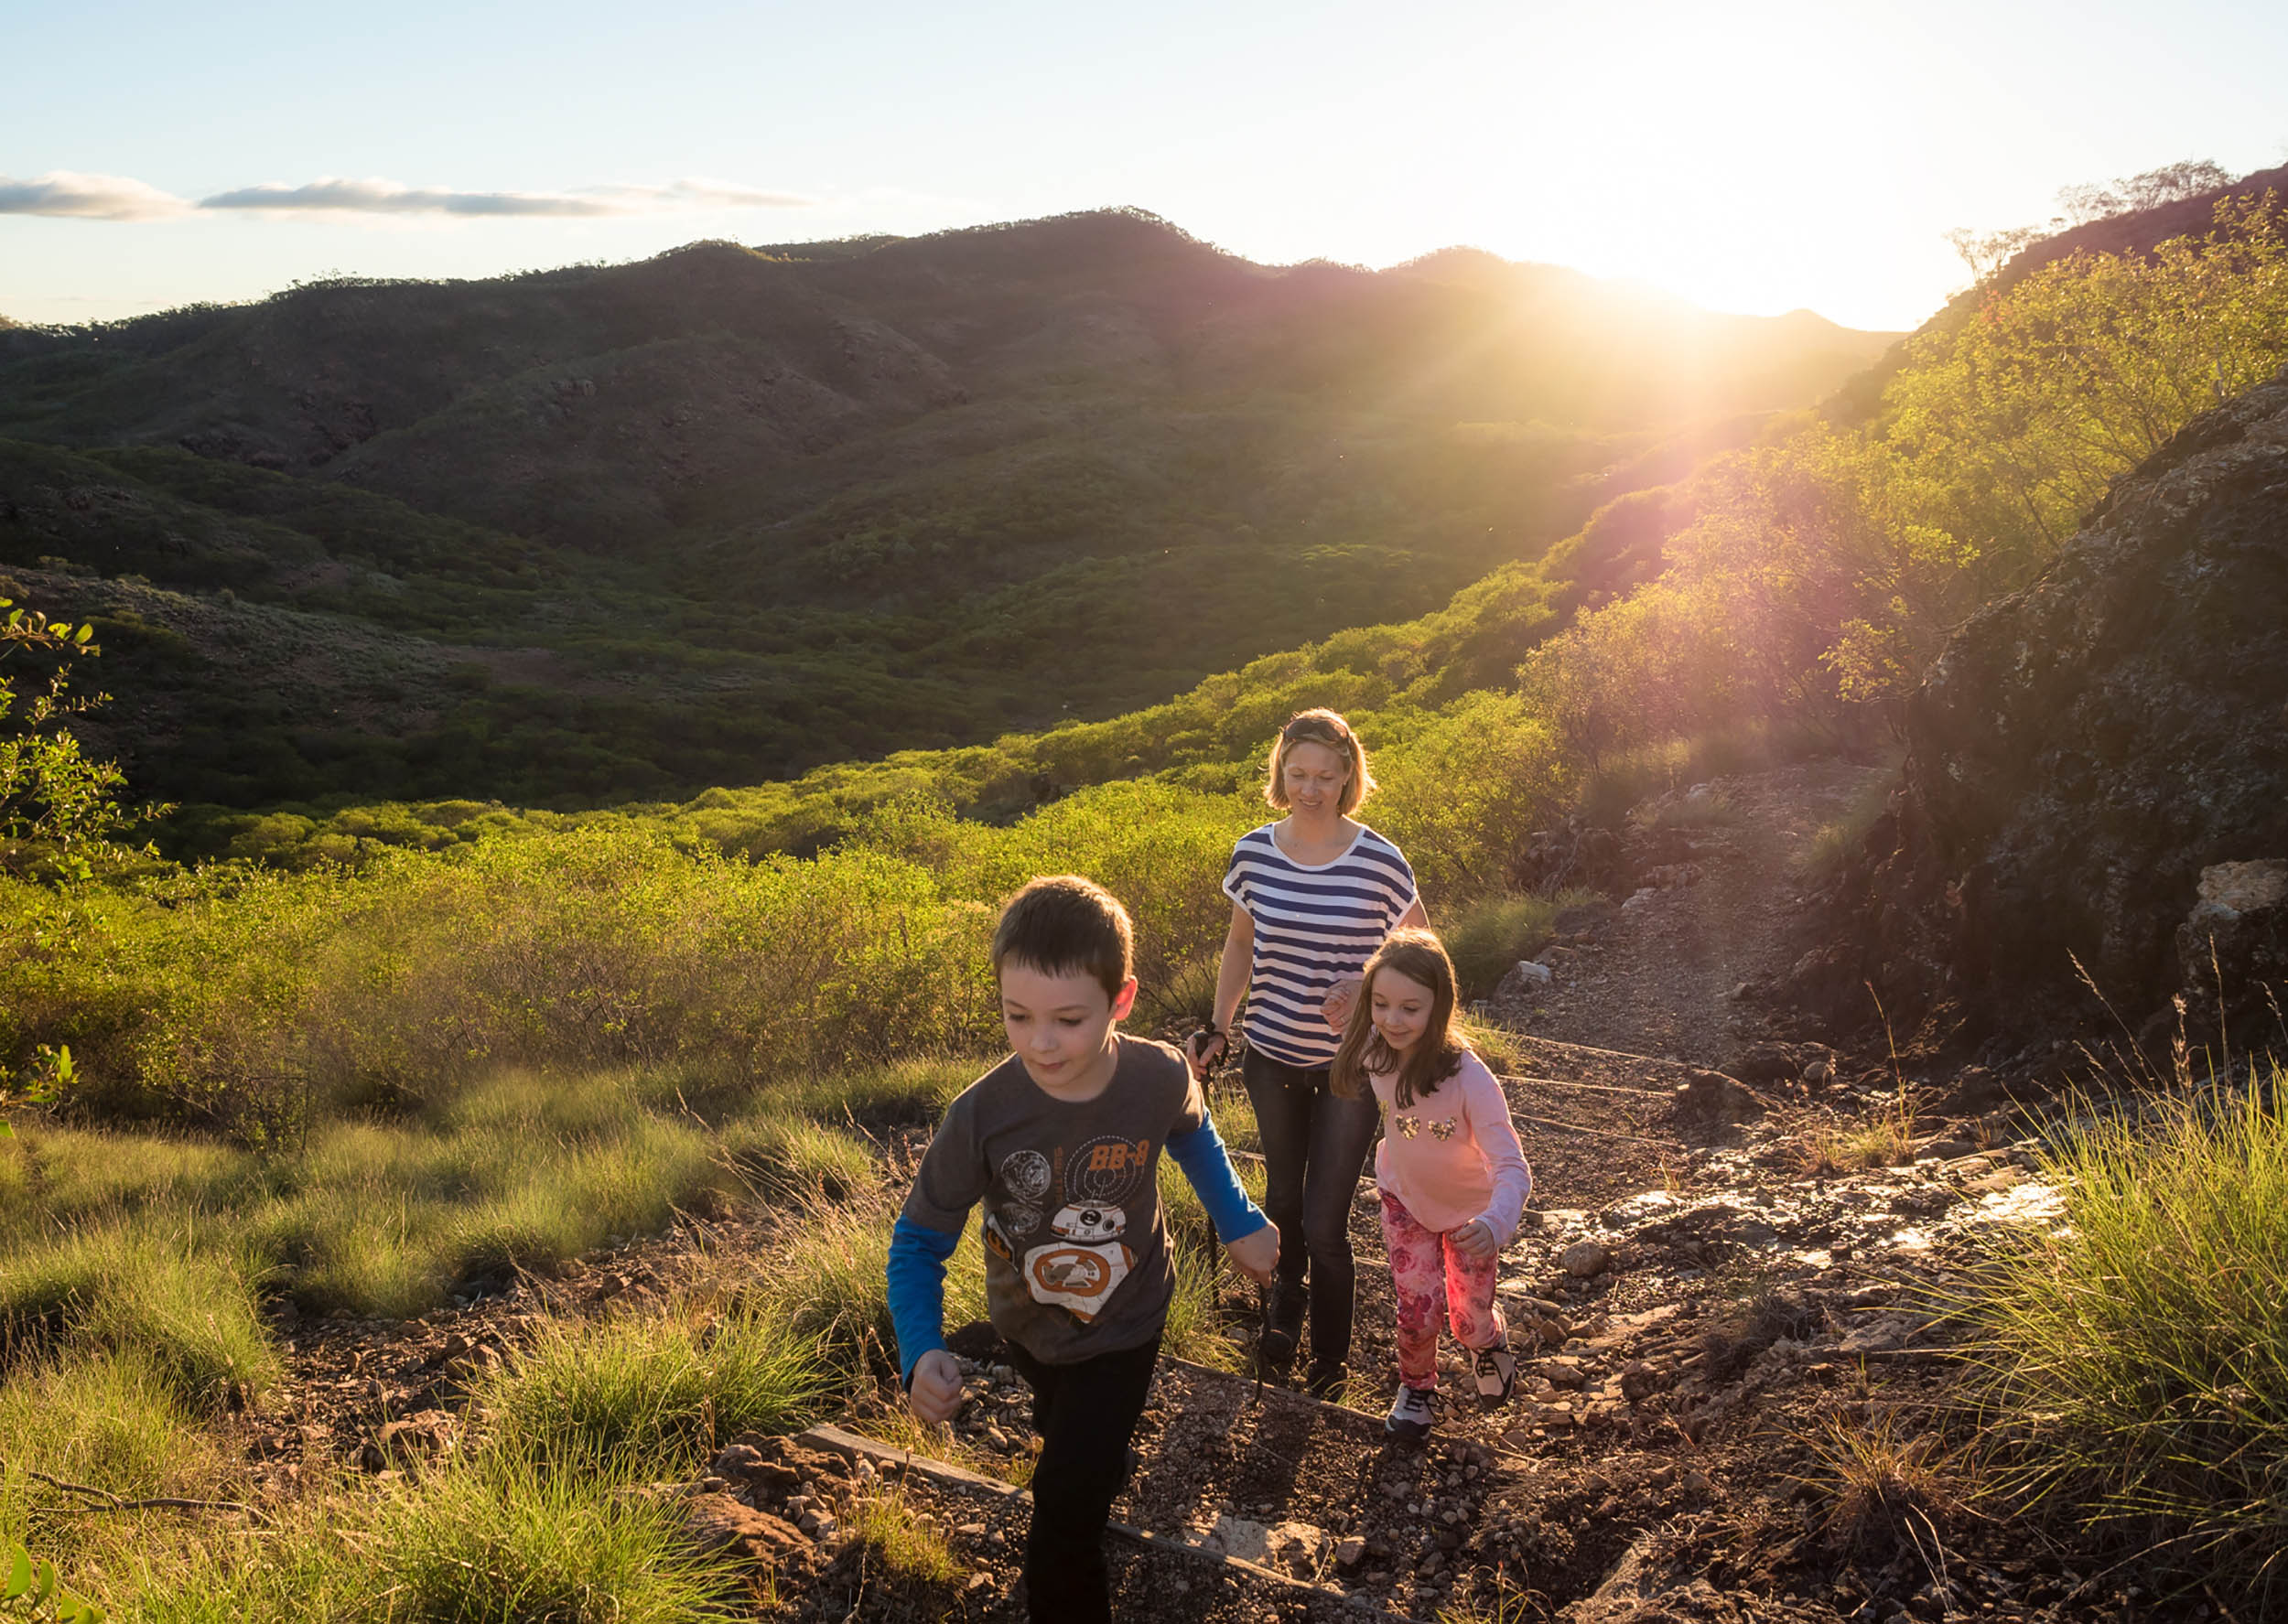
We found the resort to be the perfect location to use as a base with most other things to see and do being within easy driving distance for day trips. Walks into Wilpena Pound can take from 1 hour return, to full day hikes ranging in difficulty to suit a variety of fitness levels. If you are travelling with school age children, I would recommend trying the walk to the upper Wangara Lookout (3.5hrs/7.8kms return). It was an easy grade hike with a steeper climb towards the end. From here the view into the valley is beautiful and a perfect location to stop for lunch.

P8120293-Edit.jpg

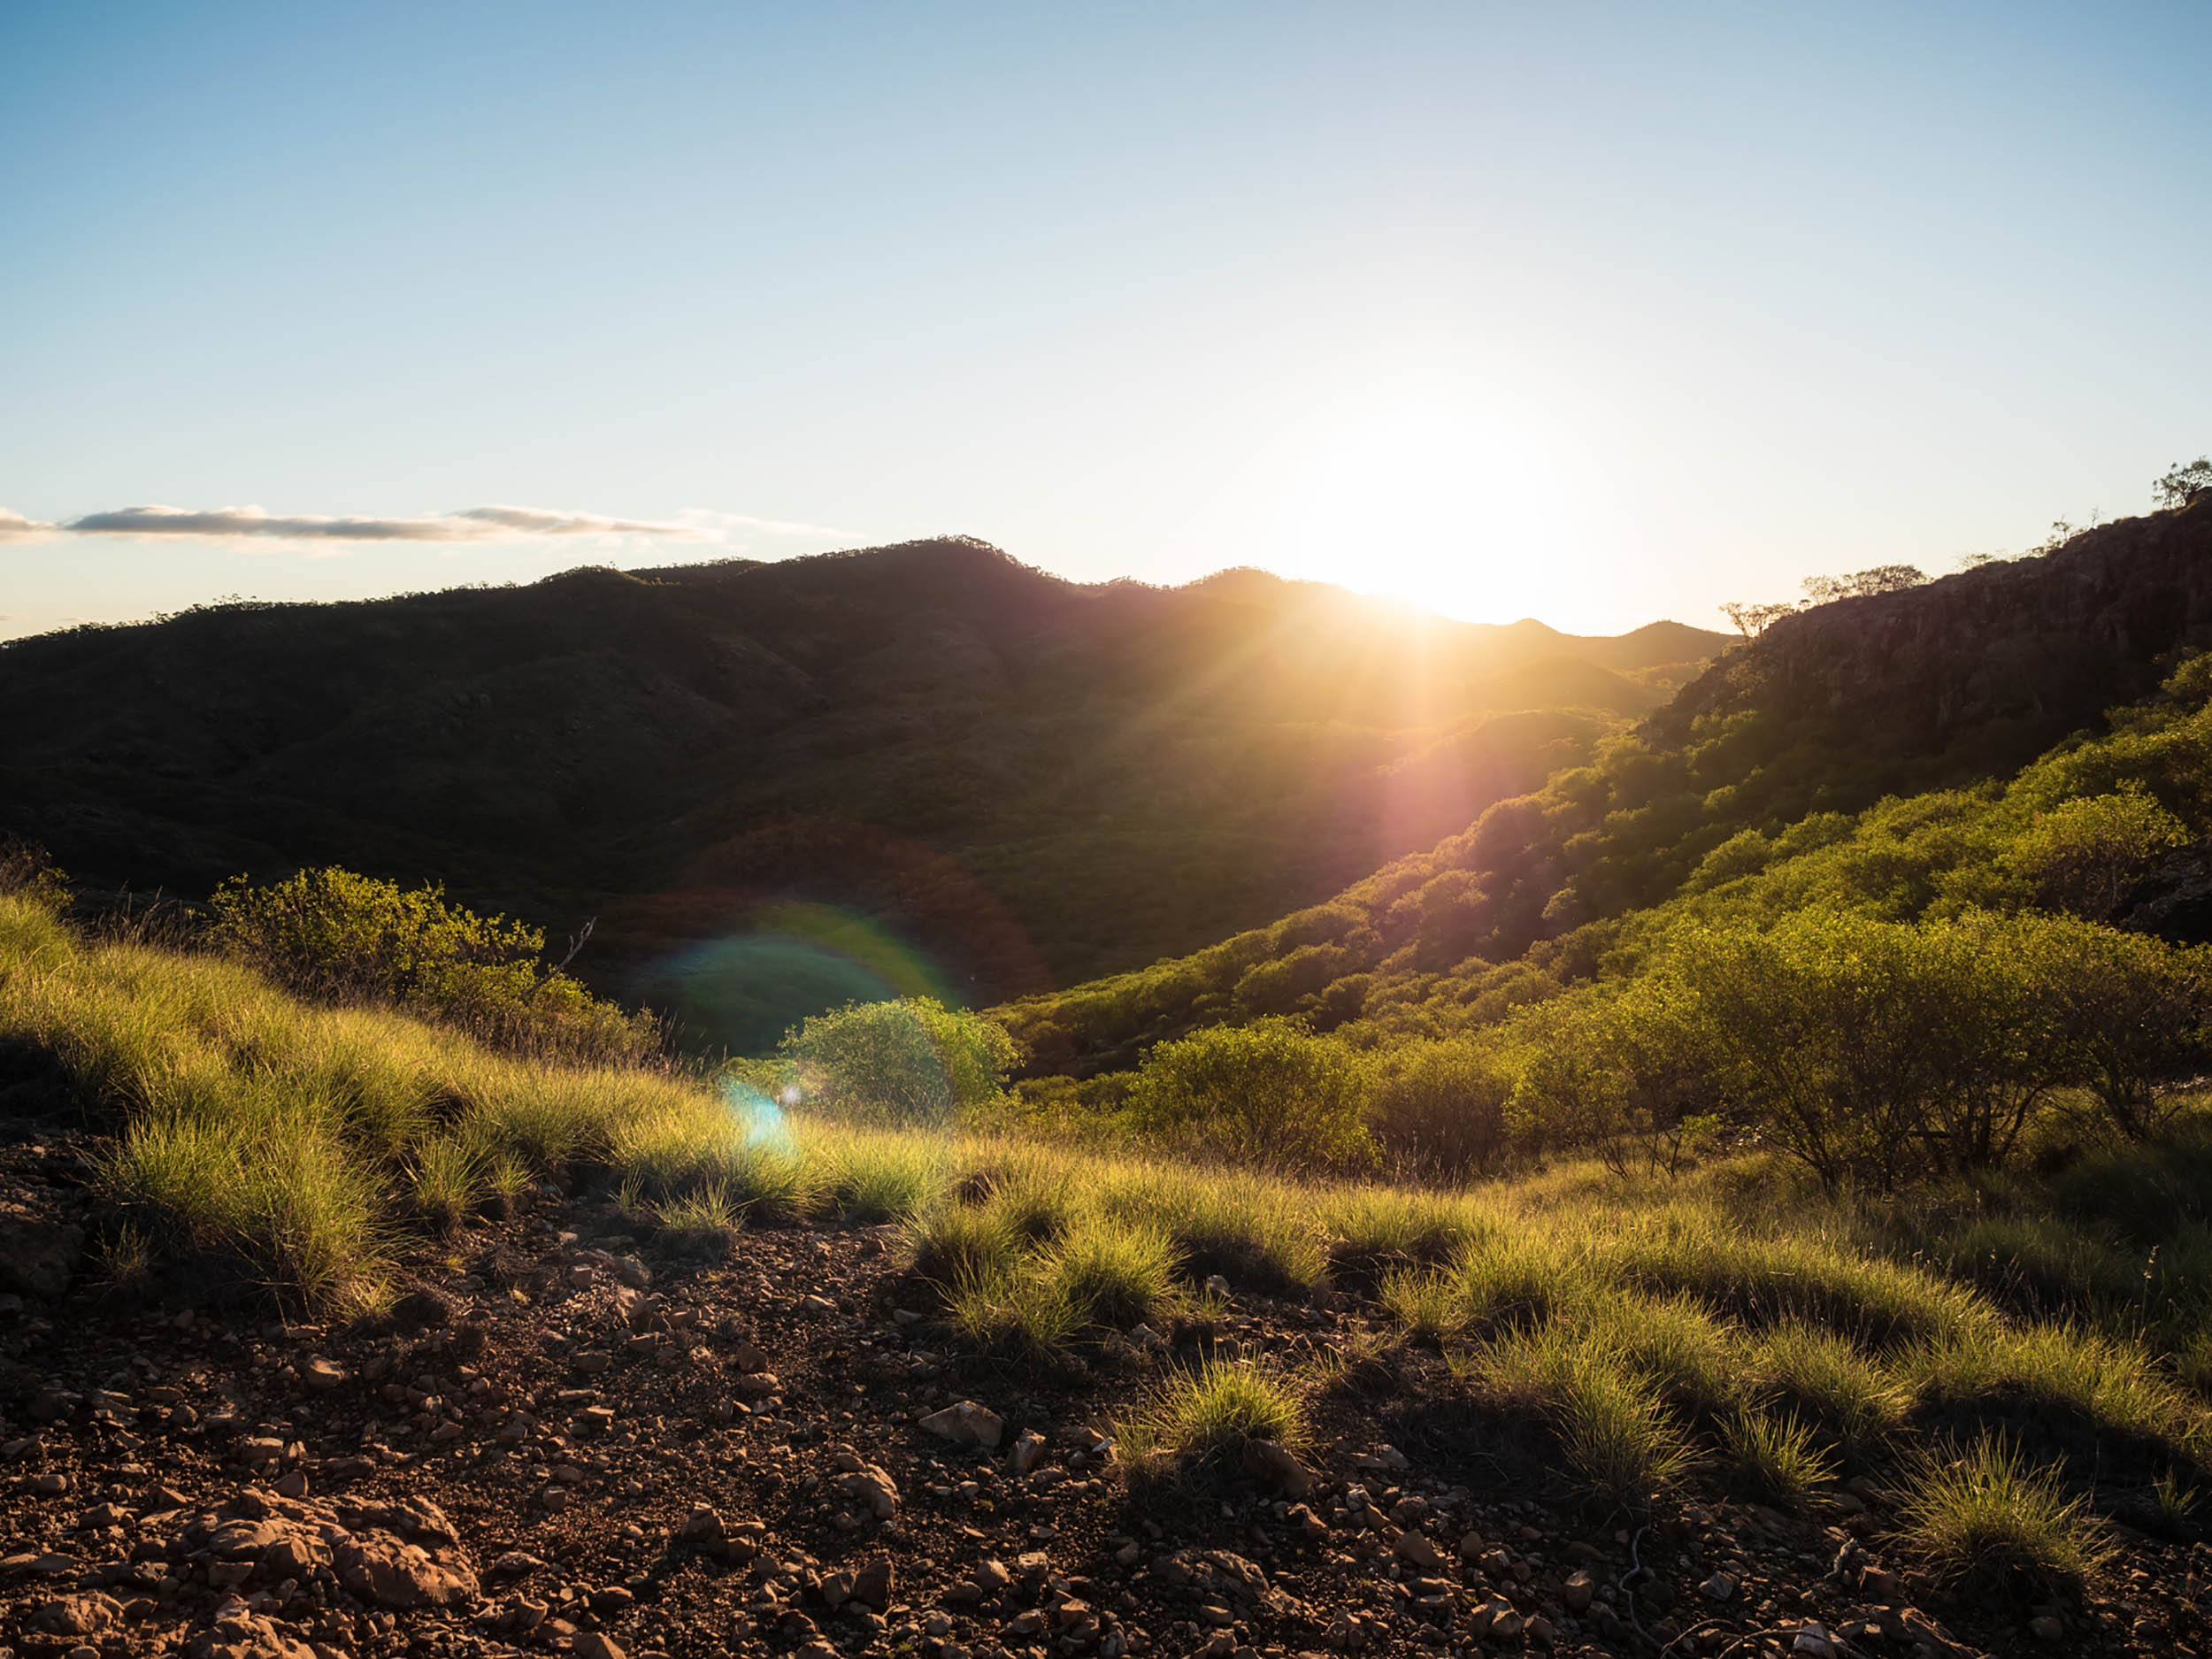
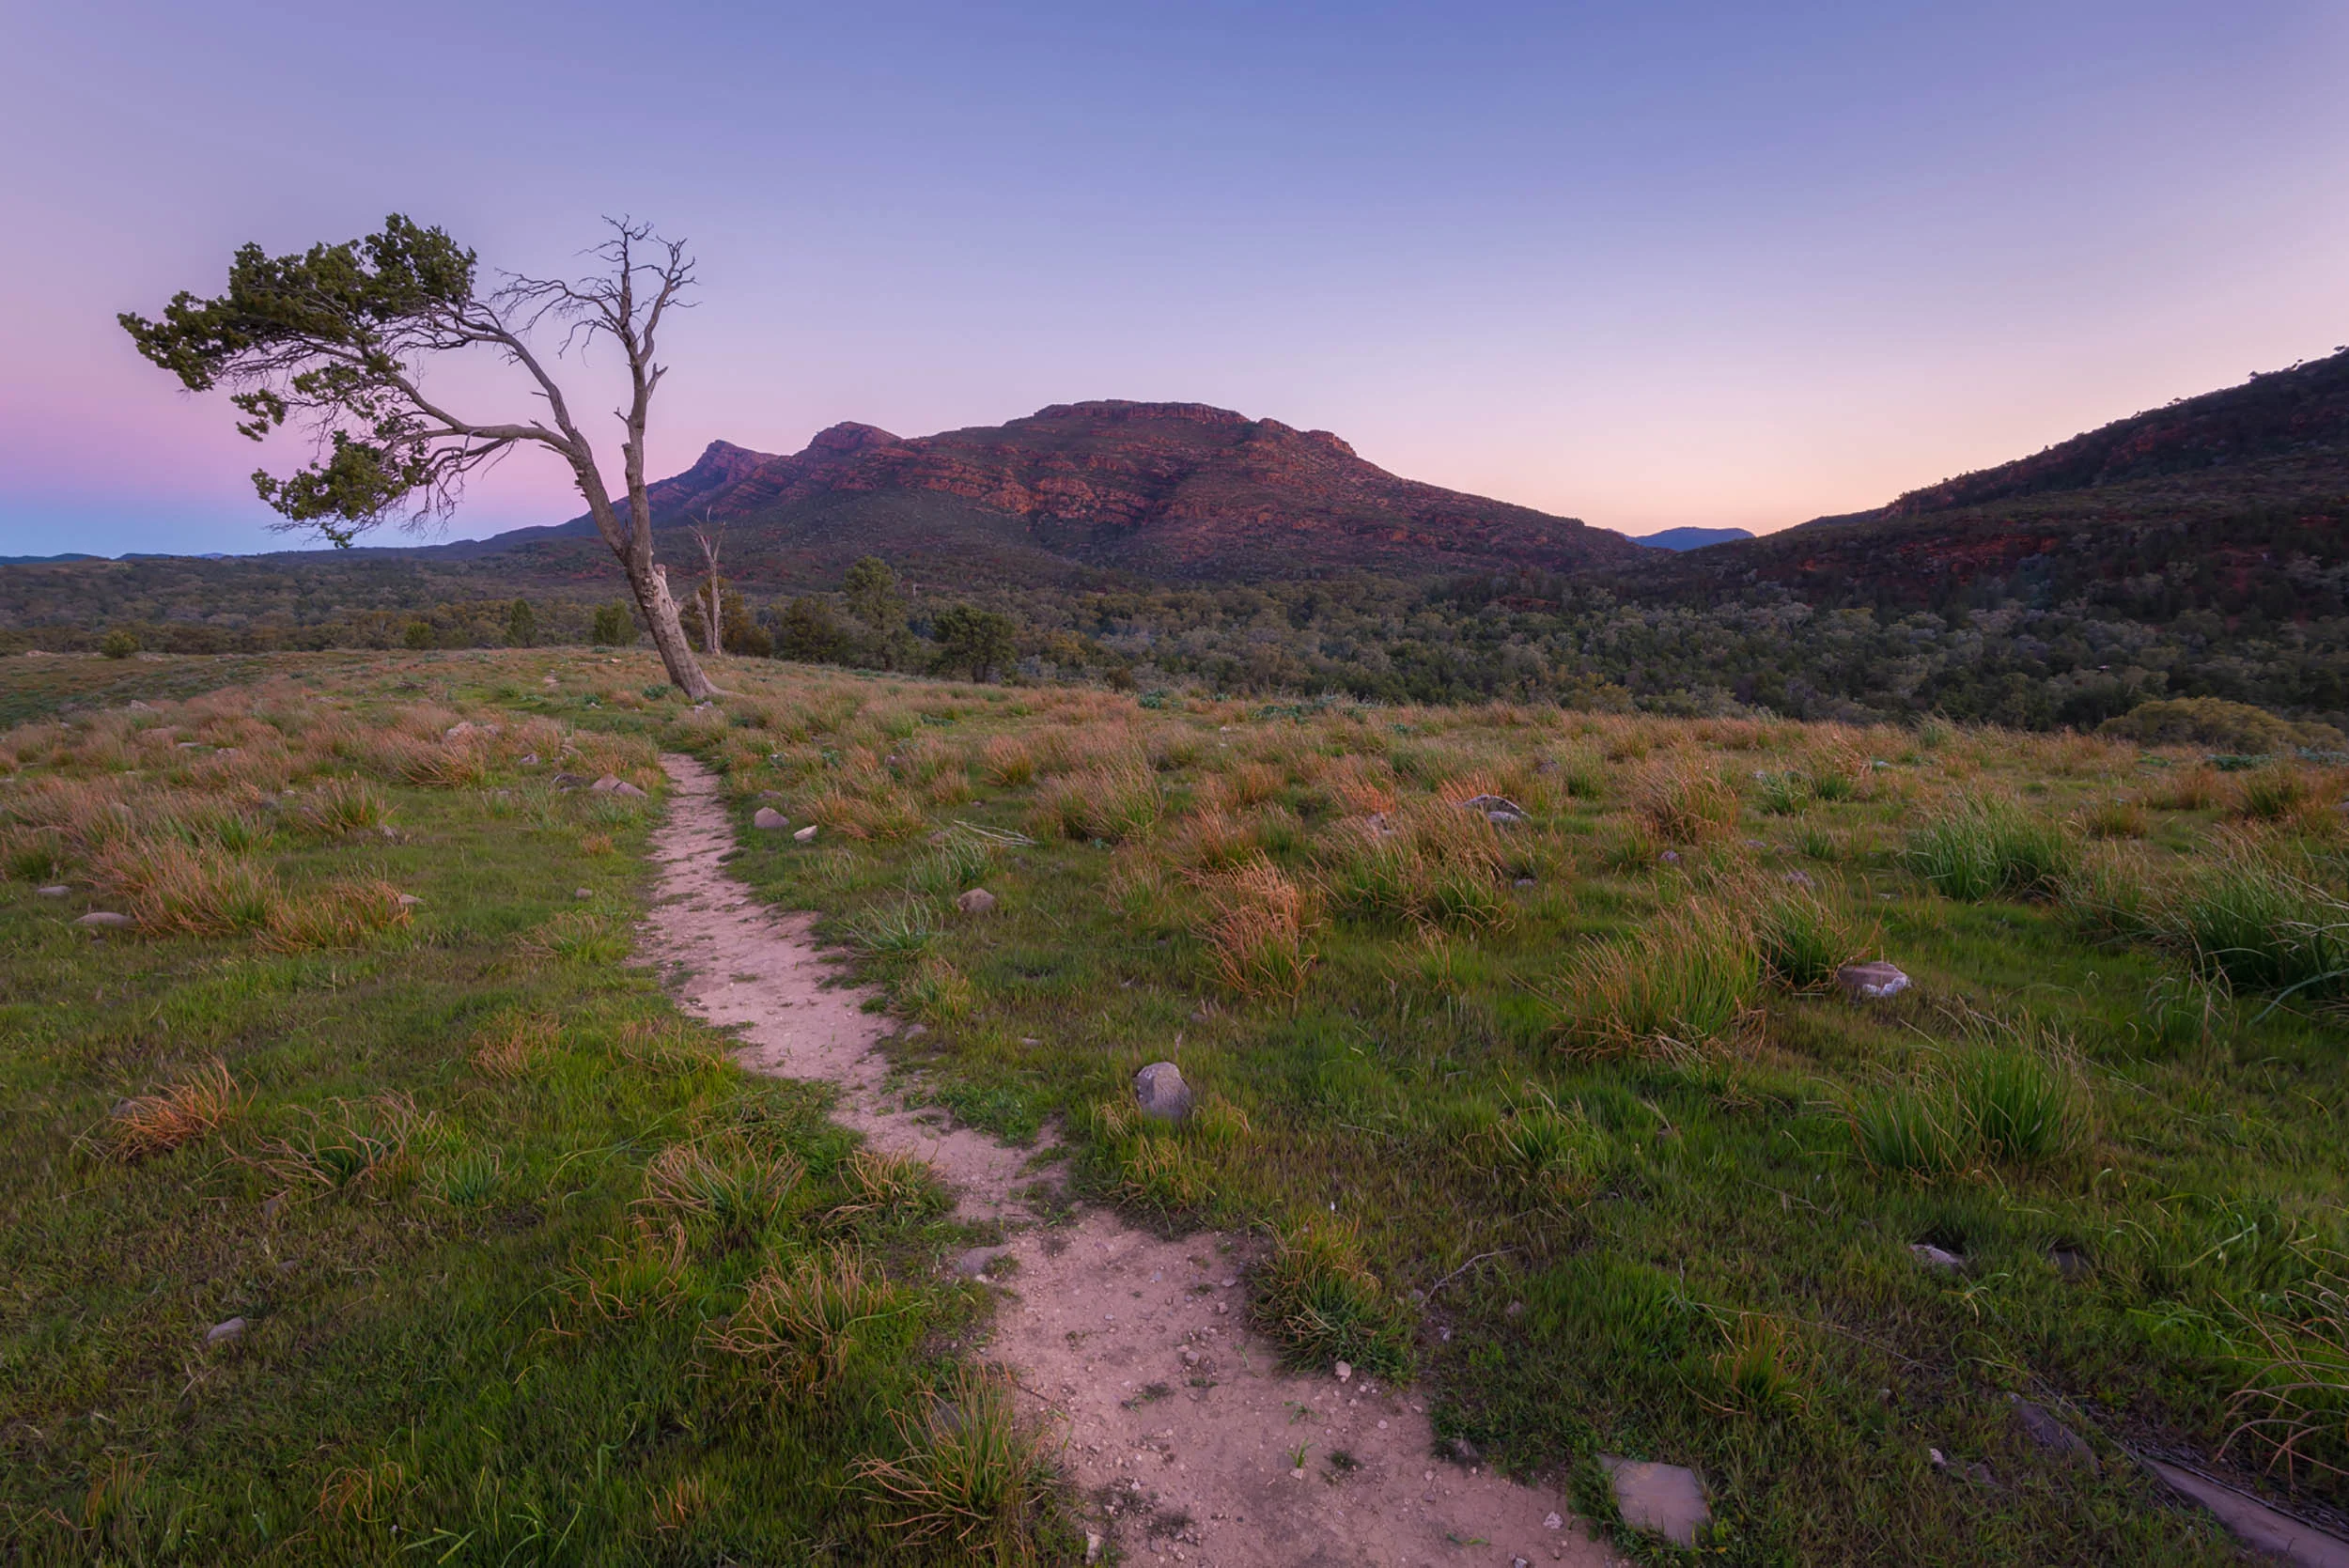
Other points of interest in the area that are definitely worth checking out are the Cazneaux Tree, Hucks Lookout, Stokes Hill Lookout and Bunyeroo Gorge. The road itself to Bunyeroo Gorge has two lookouts worth stopping at. Especially the Razorback Lookout which I found to be perfect for sunset. 

The drive in was teeming with wildlife such as the red and western grey kangaroos, the yellow-footed rock wallaby and emus. My Sigma 600mm lenscertainly came in handy on this drive and it was easy to capture some great images straight out the car window. I wouldn't recommend getting out to take any shots as it just tends to scare them away. They appear to be fairly used to cars and mostly stayed still so long as you were driving slow.

There is so much to see and do in the area that you will definitely want to stay at least 3 days minimum. Especially since the hike to St Mary Peak is an entire day in itself just to get up and back. There are many places that we didn’t get chance to see so hopefully we will make it back one day. Also if you end up camping at Wilpena Pound, be sure to take the short walk to the top of the hill at the back of the campground. It has 360 degree views of the surrounding area and is perfect for watching the sunrise/sunset.

The Flinders Ranges National Park is open all year round however some seasonal closures may occur during the summer months (check with National Parks South Australia for details). The best time to visit is in the cooler months from April to October. A Park Pass is required to access Flinders Ranges National Park. Fees can be paid in the self registration stations throughout the park or at the Wilpena Pound Visitor Information Centre. 

P8140101-Edit.jpg

Additional Images

or more information on the Flinders Ranges or Wilpena Pound go to www.southaustralia.com and www.wilpenapound.com.au


Minerva Hills National Park


Springsure is a friendly little town approximately 67km south of Emerald along the Gregory Highway in Queensland’s Capricorn region. While this is a well known location on the annual grey nomad northern pilgrimage trail, I wonder how many are aware that there is an amazing natural wonder hiding right on Springsure’s doorstep.

Virgin Rock as seen from Lions Park

Virgin Rock as seen from Lions Park

It is hard to miss the spectacular Virgin Rock and Mount Zamia which dominate the horizon as you head into the valley surrounding Springsure. The Virgin Rock has a naturally formed likeness to the Virgin Mary and Child however in recent years the image is harder to see. The cliffs are floodlit at night and really make for a spectacular scene. The best area to view the cliffs are from Lions Park approximately 4km north from Springsure.

Spotlights on Virgin Rock and Mount Zamia are stunning at night!

Spotlights on Virgin Rock and Mount Zamia are stunning at night!

I highly recommend viewing Virgin Rock from the common vantage point along the highway, however the area that I am keen to tell you about is situated just on the other side of these monoliths. 

Minerva Hills National Park is relatively small, but the perfect location for a weekend adventure. Whilst it is accessible to most vehicles, the road (which is unsealed) is rough in some areas and you may require a car with extra clearance. Our last visit was after recent rain and there was mud in places that may pose an issue if you are not in a 4WD. That however is all part of the fun!

Sunset over the valley and tablelands as seen from the top of one of the many small hills throughout the park

Sunset over the valley and tablelands as seen from the top of one of the many small hills throughout the park

I get the impression that this national park is not very well known to travellers because during the last few times that I have visited, I had that place all to myself. Now I’m certainly not complaining as I really enjoy the solitude when photographing a place like this but I can’t help but wonder how many tourists drive straight past without realising what they are missing. 

Signage to the park is pretty much none existent and even the entrance is a blink and you’ll miss it situation. Access is via the Dawson Developmental Road which heads west out of Springsure. The turn off is approximately 4km from town.

Fred's Gorge

Fred's Gorge

Once you enter the national park you slowly make your way up and around through an interesting landscape of hills and valleys with rocky ground and sparse bushland. There is one main road through the park with a number of smaller trails/walking tracks/points of interest along the way. My recommendations to check out are Fred’s Gorge Lookout/ Picnic Area, Skyline Lookout and Eclipse Gap.

Sunrise from the Eclipse Lookout

Sunrise from the Eclipse Lookout

Fred’s Gorge is a great area to stop for lunch with picnic tables, barbecues and toilets available. Eclipse Lookout is by far the most easily accessible as you can drive right up to the edge of the valley and for one view to rule them all, you simply cannot go past Skyline Lookout. At the base of the walk there is a small car park followed by a moderate grade 800m track to some amazing views over the valley and Springsure. We were there at sunset however this one would be perfect to catch the morning sun peaking into the valley.

Gorgeous sunset views along the walk to the Skyline Lookout

Gorgeous sunset views along the walk to the Skyline Lookout

Wildlife to watch out for range from eastern grey kangaroos, wallaroos and wallabies (we came across plenty of these little guys) to nocturnal critters such as the sugar-glider and the larger greater-glider. 

If you are travelling through this part of the world on your way to Carnarvon Gorge or heading north, it is well worth the extra night in Springsure to check it out. All you need to take with you is a picnic lunch, your hiking boots and a sense of adventure.

Additional Images


Welcome to the Outback


We have officially been on the road now for a whole week and despite having some wet weather in the latter half, the first half was absolutely glorious. 

Redbank Park, Jericho

Our first stop was Redbank Park in Jericho which is a very relaxing location just off the Capricorn Highway. You can camp right on the banks of the creek that runs through the park and kick back in the shade with a cool drink while the sun goes down. It is a great spot to spend a few days doing pretty much nothing. While there is no cost to stay at the park, gold coin donations are appreciated and absolutely essential to keeping gems like this open to weary travellers. The Jericho State School also runs a pancakes and sausage breakfast every Sunday morning at the park which is another way to support the local community while you are passing through.

IMG_6921.jpg

Barcaldine

After leaving Jericho, we drove all of 90 kms down the road to Barcaldine to check out the famed Tree of Knowledge. As I’m sure you already know, the Tree of Knowledge was a tree in Barcaldine which is regarded as the birthplace of the Australian Labor Party and the Union movement. Unfortunately the tree was poisoned in an act of vandalism in 2006. The remains of the original tree are preserved in a spectacular, award winning memorial on the site, with the architectural beauty being best viewed at night where the tree is lit up with coloured lights. Look closely at the base and you can even see the remnants of the roots below the transparent tiles!

P7120221.jpg

Lara Wetlands

My favourite part of this week though was our night at Lara Wetlands. Lara Wetlands is 28kms south of Barcaldine just off the Landsborough Highway. After leaving the highway at the turnoff, there is a final 13kms of graded dirt road. This part of the road can be corrugated in places but overall is quite good and it is definitely 2WD accessible. The wetlands are home to an abundant array of birds and wildlife and camping sites are available for rigs of all sizes. Toilets and hot showers are available with access to drinkable artesian water, however the sites do not have power.

DSC_1994-Edit.jpg

Included in the nightly rates are full use of kayaks for exploring the lagoon, children's playground, camp kitchen and a thermal controlled artesian mineral hot pool (perfect for warming up during those cool evenings)! The wetlands are a paradise for wildlife and landscape photographers, so needless to say I took advantage of every moment to grab shots around the lagoon. Sunrise and sunset provide beautiful reflections over the water and I had a great time testing out my new Nisi 10 stop ND filter. After sunrise, I spent an hour or so capturing the abundant birdlife with my Sigma 600mm lens. My only regret from our time at Lara Wetlands was that we didn’t stay longer. We left after one night to avoid the incoming rain deluge however it as it turns out, we would have been safe after all.

Winton

It would unfortunately be the second part of our week in the small town of Winton where we would encounter the rain. This prevented us from visiting the two main attractions of Lark Quarry and the Australian Age of Dinosaurs Museum (currently only accessible by dirt road and the roads became impassible). Fortunately for us, the team at the Age of Dinosaurs Museum had a contingency plan and very generously brought a mobile fossil display in to the Winton Visitor Information Centre. Nice work guys! 

Another bonus is that Winton isn’t a long drive from Rockhampton, so I am certain we will return during more favourable weather. 

Well that’s all for our first week. I had originally planned to just focus on Lara Wetlands for this post but once I started typing, I found myself including everything. Future blog entries though may only cover one destination per post. I’m just going to wing it at this stage and see what works best :) 

Next week we will be slowly making our way back towards Emerald in the lead up to a shoot I have scheduled at Carnarvon Gorge (weather permitting). 

I can’t wait!


Time to Hit the Road


This will probably be my last sunset down at Yeppoon for quite a while.

As some of you may know, I will be taking a step back from my current job to travel Australia with my family. I have discovered since falling in love with photography, a deep yearning to travel and explore more of our beautiful country.

Whilst I have appreciated the amazing scenery we have here in this region, the rest of Australia is quite stunning as well (who knew), and I can't wait to get out there and start photographing it. 

My very understanding wife and children will be coming along for the ride and I'm sure this trip will be an amazing bonding experience for us all. Close proximity with 2 boisterous children for 6 months, 24 hours a day, 7 days a week in a caravan....what could go wrong :)

Check out our mobile abode in the image below.

We conducted significant research on caravans/mobile homes in the lead up to this trip and we eventually decided to go with an 2016 Adria Altea. Adria caravans are a European make and design and have won numerous awards throughout their long history. While it is not as large as some of it's Australian made counterparts, it suits our needs perfectly and has made our recent long weekend jaunts very comfortable.

I will be regularly posting to all of my social channels and here on my blog so please feel free to continue following my page to keep up to date with photography tips, reviews and destination write ups from our travels.

See you out on the road!


How to Photograph Stars


While I don’t claim to be an expert in astrophotography, I regularly get asked on social media about my settings and what gear I use to capture my images. I’ve included some information below on the tricks and techniques that I’ve learned through trial and error and other online sources. Hopefully they will be useful to you and other keen photographers out looking to capture the heavens in all their glory.

Nikon D800 @ ISO 3200 | f/2.8 | 14mm | 25 sec

Nikon D800 @ ISO 3200 | f/2.8 | 14mm | 25 sec

What Gear Do You Need? 

  • Sturdy tripod: Carbon Fibre or Aluminium, it doesn't really matter which.  
  • Wide angle lens: The wider, the better.
  • Shutter release cable or remote trigger: You can find heaps of third party brands cheap on Ebay.
  • And of course, your Camera :)

What's in my Bag?

Not that it matters, but I have also included the current gear that I use for astrophotography below:

NIKON D800 @ ISO 1250 | f/2.8 | 14mm | 25 sec

NIKON D800 @ ISO 1250 | f/2.8 | 14mm | 25 sec

Choosing a Location

To begin with you will need to choose a location that has a relatively unobstructed view of the sky. Also make sure that the location you choose is far enough away from city lights that you can clearly see the stars without too much light pollution. If there is too much ambient light around, you will not be able to capture the required detail to make the stars and Milky Way really stand out. The best time to plan to shoot is around a new moon and when the sky is free from clouds.

Useful Apps

There are a number of great smart phone apps available that will be able to help you plan out your shoot. 

The apps that I regularly use are: 

These apps will be able to provide you with a good indication on where constellations will be at any given time, which will help plan out your compositions.

Olympus OM-D E-M5 Mark 2 @ ISO 2500 | f/2.8 | 14mm | 20 sec

Olympus OM-D E-M5 Mark 2 @ ISO 2500 | f/2.8 | 14mm | 20 sec

Lets Start Shooting

Now that we have covered the logistics side of things, we can look at what gear we need and how to set about capturing the stars.

As listed above, a tripod is a ‘must have’ piece of equipment for these type of shots. You are going to be shooting at long shutter speeds, so your camera needs to be perfectly still. You don’t require an expensive tripod, just something that is sturdy and can support your camera steadily for long periods.

While you can shoot astrophotography with just about any lens, my glass of choice is always wide and fast. Wide, because it is normally desirable to capture as much of the sky as possible while still leaving room for some foreground interest…and fast, because it helps to have a lens with a fast aperture so that you can draw in as much light as possible. An aperture from f/2.8 to f/4 would be perfect. If you have a variable aperture lens, just set it to as wide open as it will go for that focal length.

NIKON D800 @ ISO 2500 | f/4 | 18mm | 30 sec

NIKON D800 @ ISO 2500 | f/4 | 18mm | 30 sec

Focusing your lens is something that can be tricky because you are essentially in complete darkness and our cameras cannot see in the dark. One trick is to shine a flash light on a reference point halfway into your frame so that you can lock focus. Another alternative is to set your lens to it’s infinity point. For some lenses, this will be marked on the body and it will just require you to switch to manual focus and move focus to that point. If your lens doesn’t have infinity marked out, try manually focussing all the way to the right and then bring it back slightly. This will give you an approximate infinity point and you can fine tune your focus from there after taking a few test shots.

In addition to the above, I always like to utilise a shutter release cable so that I can trigger the shot without having to touch the camera and create unnecessary movement. Remote triggers and shutter release cables are relatively inexpensive and you can always find cheap, third party brands on Ebay for your particular camera. Always make sure that the one you choose is compatible with your camera. If you don’t have a shutter release cable you can utilise your camera’s built in timer delay. This mode provides you with a delay between when you to press the shutter button and when the camera actually takes the shot. Now you have time to press the shutter button and remove your hands from the camera to allow for any vibration to cease before the shot is taken.

NIKON D800 @ ISO 1250 | f/2.8 | 14mm | 20 sec

NIKON D800 @ ISO 1250 | f/2.8 | 14mm | 20 sec

Your camera is the final ingredient in this mix, however as mentioned above, you don’t need the most expensive gear to get a decent capture of the stars. Whether you have a compact ‘point and shoot’, crop sensor DSLR or mirrorless camera…provided you can access the camera’s manual mode, you will be able to see some stars. Yes, the sensor size of your camera will determine how much noise and detail is in your photo but for those of you that are just starting out, what you already have will be fine.

What Settings Do I Use?

As I said before, you will ideally be wanting to shoot at a fast aperture, somewhere between f/2.8 and f/4. Also using a longer shutter speed will allow more time for the ambient light and the light from the stars to fill the camera’s sensor and create an image that isn’t viewable with the naked eye. For my camera, I have found that anything from a 20-30 sec exposure works well however this will also be dependant on your other settings. To ensure that your stars are tack sharp you will need to experiment with your shutter speed to find out what works best. Otherwise if your shutter speed is too long, the stars will start to trail and won’t appear as sharp (unless you are aiming for star trails in which case, the longer the better). The other element to consider is your ISO. Your particular camera will determine how high you can go but I tend to choose anywhere between 1500 to 2500, sometimes going up to 3200.

Olympus OM-D E-M5 MkII @ ISO 2000 | f/2.8 | 14mm | 25 mins

Olympus OM-D E-M5 MkII @ ISO 2000 | f/2.8 | 14mm | 25 mins

Let There Be Light

The final part of creating your image is entirely up to you and will be solely dependant your creativity and the look you are trying to achieve. Foreground interest can be imperative for creating an interesting image, allowing you to include elements that draw the viewers eye into the frame. A darkened foreground with silhouettes can be quite effective. 

The other option is a technique called ‘light painting’. By taking a portable light source like a flash light or even a mobile phone, you can literally use it to paint light over the foreground. As the camera is taking a long exposure to capture all the light from the stars, it is also layering all of the light from the external source into the scene. I normally keep the power on the light source low so as not to over expose the foreground however you will probably find this process to be mainly trial and error to begin with. In some circumstances I have even found that the headlights of passing cars (if you are close to a road) can add some really cool and dramatic effects.

NIKON D800 @ ISO 2500 | f/2.8 | 15mm | 25 sec

NIKON D800 @ ISO 2500 | f/2.8 | 15mm | 25 sec

I hope this overview of astrophotography has been helpful and while I have tried to keep this brief tutorial relatively basic, some of you may still find it a little technical. If you have any questions about what I have included here or anything else related to photographing the night sky, please feel free to comment below, email me directly via my contact form or message me on my Facebook page.